A new rim is clamped in a form, ready for gluing on the back.
Three tops have had amber shellac applied to their interior surfaces.

Integrally carved curvilinear tone bars!
Backs and rims for three guitars have been assembled, and shellac applied to their interior surfaces.
An end block.
A neck block and cutaway interior.
There’s plenty of figure on this 16” Skylark Spirit.
This 17” Skylark Spirit has red heart and sapwood big leaf maple.
A “Pure Archtop” pickup from K&K Sound.
My label applied.
My label closeup.
A top is glued on from the bottom to keep glue from running everywhere.
Cutting a ledge for purfling.
This 16” Skylark Spirit has nice golden and red big leaf maple.
Scraping binding flush with the recurve.
Burning the midnight oil.
A neck blank glued up. Eastern hard rock maple with walnut center stripe. This will yield two necks.
Parts for a neck cradle, a jig to hold a neck blank down on the CNC router table while machining the back and side surfaces.
A neck blank ready to be machined into pieces for two necks. 4 1/2 inch bolts hold it securely down to t-nuts on the spoil board, which is in turn bolted to t-nuts in the center slot of the table.
5 inch (1/2 inch diameter) cutter makes a 1/4 inch pass in cutting the neck outlines. The corner that the cutter has just passed is the fingerboard to peg head junction.
A router table is used to cut a slot for the truss rod.
Two neck blanks are ready for machining. One is mounted in the cradle.
First the heel takes shape. This is a roughing operation, taking 1/8 inch in each pass, and leaving 1/16 for the finishing operations to clean up.
The roughing operation is complete.
Roughing steps on the back of the peg head.
Z-level finishing has been done, to smooth mostly vertical surfaces, and now the final finishing operation is underway, smoothing out mostly horizontal surfaces. This brings the neck to within 1/64 of its final shape, enough margin left so that we can sand out the machining marks.

It can be mesmerizing to watch the cutter swing back and forth across the back of the neck.
When we get to this point we know the neck machining operation is almost finished!
Two necks machined and ready for the next steps.
Three necks with truss rods installed.
Finger boards and peg head overlays re-sawn and thickness sanded. Vera wood, Honduran rosewood, and snake wood, left to right and bottom to top.
Korean awabi abalam, green abalone, pink and gold pearl, and brown lip pearl blanks have been attached to a spoil board with hide glue. Defects in the blanks are marked so that inlays can be nested in useable areas using a scan of the board.
Master luthier Patrick McCarthy volunteers. He is doing some final shaping of the recurve.
Hand sanding with a rubber block.
Sweating the details.
Inlay machining underway.
After about three hours and one tool change, machining of inlays is complete. Peg head and fingerboard decorations for three guitars, five maker’s logos, and 100 side dot position markers.
Removing inlays from spoil board with hot water.
Almost everything falls off the spoil board easily.
A 17” Skylark Spirit mounted in the jig for cutting neck joint mortise and tenon.
A mortise has been cut. I bought templates from Stewart MacDonald, but the angle was not acute enough for me, so I made some of my own, on the Techno CNC router. They work perfectly. I can fit a neck with no shims at all.
A neck mounted in the jig.
A tenon partially cut. At this point the tenon is still too big, but I begin to check the fit of the neck in the body, move the template and cut the tenon smaller, and then recheck until the fit is close enough to finish fitting by hand.
Checking the lateral alignment of the neck.
Neck extensions after machining. The transition between the area touching the top over the neck block, and the area that floats free of the top, has been penciled in.
A neck extension has been fitted to the neck tenon, and a cavity for the finger rest bracket has been cut.
Master luthier Patrick McCarthy gluing on a neck extension.
Three necks are now ready for final fitting to the body.
The neck extensions have been fit flush with the front surface of the neck.
Patrick chalk fitting a neck extension to the top of the guitar.
Peg head overlays ready for machining.
A neck extension with final fitting completed.
Final fitting of another neck extension underway.
Machining of peg head overlays is complete.
Maker’s logos have been installed.
Tri-strand peghead decorations have been installed.
Patrick gluing on a peg head overlay.
Burning the midnight oil again. Michael checking out peg head personalities.
One more gluing operation, and some trimming remains to be done.
Interacting with the Techno machine interface.
Finger board machining underway.
Reaming holes for mounting tuning machines.
Finger board machining complete.
Checking back surface of finger board.
Cupping back surface of fingerboard slightly.
Finger board inlays installed.
Fueled by hot carob!
Checking the flatness of the front surface of a neck.
A neck is fully assembled.
Leveling the front surface of another neck.
Yukari McCarthy does final leveling of finger board inlays.
Michael checking final neck shape while Patrick prepares to assemble a completed neck to a body.

A guitar is born!
Another guitar is born!
Yet another!
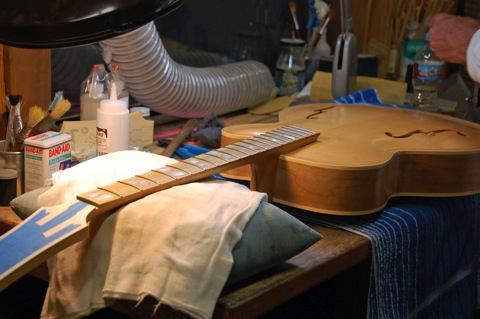
An 18” Skylark assembled in March is finally getting its frets.
Driving in the last few frets, the neck extension is supported by a leather strip and a sand bag.
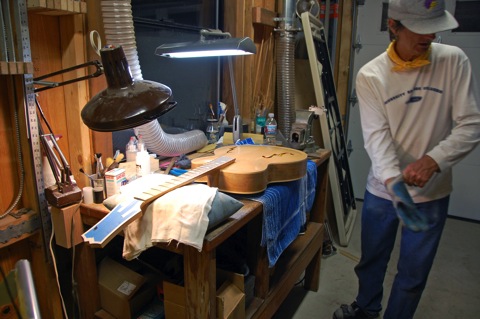
Four guitars being finished.
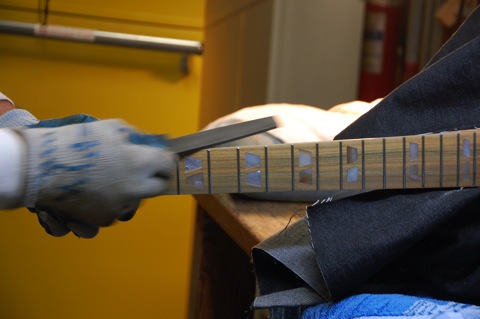
Checking the frets with a triangular straight edge that has sides which will bridge any three frets and show high spots.
Beveling fret ends.
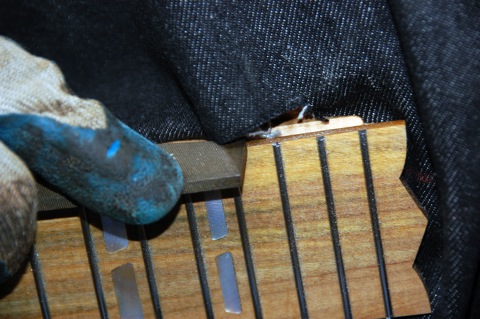
Margin delimited fret slots cut by CNC are checked and deepened as required with a fret slot chisel made from an “X-Acto” knife.
Fret wire is given a good radius in this handy jig from LMI.
This LMI jig is indispensable in working with stainless steel fret wire. A thumbscrew underneath holds a fret in place. The rollers guide the file to the right depth to remove the tang at the end of the fret, where the fret overlaps the binding or the margin delimited fret board edge.
Burning the midnight oil again, the third fret job of the day nears completion.
The edge of a mill bastard file will cause distress to a bare hand before long.
Beveling fret ends again.
A denim security blanket provides some protection for the guitar.
Blanks for bridge feet have been given a 2D profile for their underside, and are beginning to get their top side carved.
Revising the top side cutting path a bit.
In drilling the holes for the adjustment posts, there was not quite enough clearance specified for the cutter to pass between the two holes. Luckily, the error was detected and the program stopped before the trough between the holes got too deep. This blank is still usable.
A bridge saddle takes shape.
A Skylark ebony finger rest gets bound.
The nerve-wracking step of carving the cavity for the tailpiece saddle. Patrick McCarthy and his nerves of steel.

The out feed table of the drum sander serves as a sanding surface for leveling a bound truss rod cover. Less than 24 hours to go before check in for the Healdsburg Guitar Festival. Patrick calls his wife: “Honey, it’s going to be a long night, but I’m happy as a clam...”
Going through the grits.
Templates for finger rests and truss rod covers, bound and unbound. These parts are easily made by hand.
Fitting a nut.
Nut and bridge fitting, not quite as simultaneous as it might look. Patrick soon demanded no further movement.
Bridge feet have been fit to the top. Now the nut can be completed, and then the bridge saddle and tail piece saddle can be adjusted.
This bridge is adjustable, but quite different from a typical adjustable arch top bridge. The posts are titanium, which is relatively transparent acoustically; it transmits the full tonal spectrum. The wheels are two layers of honduran rosewood, with the grain opposed at 90 degrees to prevent splitting, and are threaded and glued to the posts. The upper posts are threaded into the bridge saddle, and the unthreaded lower posts are free fitted into holes in the bridge foot that are reamed to size from the bottom side, so that they fit closely only at the top surface of the foot. This allows the tightly coupled saddle/post structure to settle firmly on the foot under string tension. Patrick McCarthy refined this system for string bass bridges, and it is in wide use by top symphony players. He says that on most basses it sounds better than a one piece bridge, because the slight amount of play introduced allows the structure to settle in more completely under string tension and thus propagate string energy more freely. Two separate bridge feet allow cross dipole and long dipole movement that is more complex.
Checking the overall saddle height.
The action is still too high, but this thing sounds pretty good already!
Installing used strings one by one, and cutting nut slots.
It is starting to get light outside; adjusting the tailpiece saddle on the last guitar.
It has been a long night; tuning up.
Trying the action out.
Good old open E.
A big guitar for big hands.
A classic look and feel.
Seems like we’ll make it to the church on time.